NOTICE: This tutorial is out-of-date! The updated tutorial can be found at http://www.tktalkie.com/tutorial
.

Version 1 on the left (20mm high), Version 2 on the right (7.5mm high)
Not long after putting up the original TK Talkie tutorial I ordered another set of Teensy boards from pjrc.com. This time, however, I ordered the pre-pinned Teensy and, well, the pins are soldered on differently (on the other side of the board from the way I did it…don’t know why I didn’t notice this the first time…)
While designing a 3-D printed case for what I’m now calling Version 1, I noticed to get everything to fit the case needed to be around 25mm high. That really bothered me because I wanted this project to be as compact as possible. The boards with the sockets and headers stacked together (see Version 1 tutorial) are about 20mm high. With the pre-pinned version just soldered directly onto the Audio Shield, the overall height is around 7.5mm! That’s great for something really compact!
Of course this new design precludes you from being able to swap out the Teensy or Audio Shield by pulling them apart, but since this is a purpose-built project, that’s probably way down on the list of priorities. You trade convenience for compactness. If you still want that capability, you can build Version 1. Also, you can desolder the boards for Version 2 if you really need to take them apart.
In order to build Version 2, follow the Version 1 tutorial, but when you get to the part about attaching the boards together, skip it and solder the pre-pinned Teensy directly to the Audio shield (see pic) AFTER soldering lead wires for the microphone, being careful (as always) to make sure the pins are properly aligned.
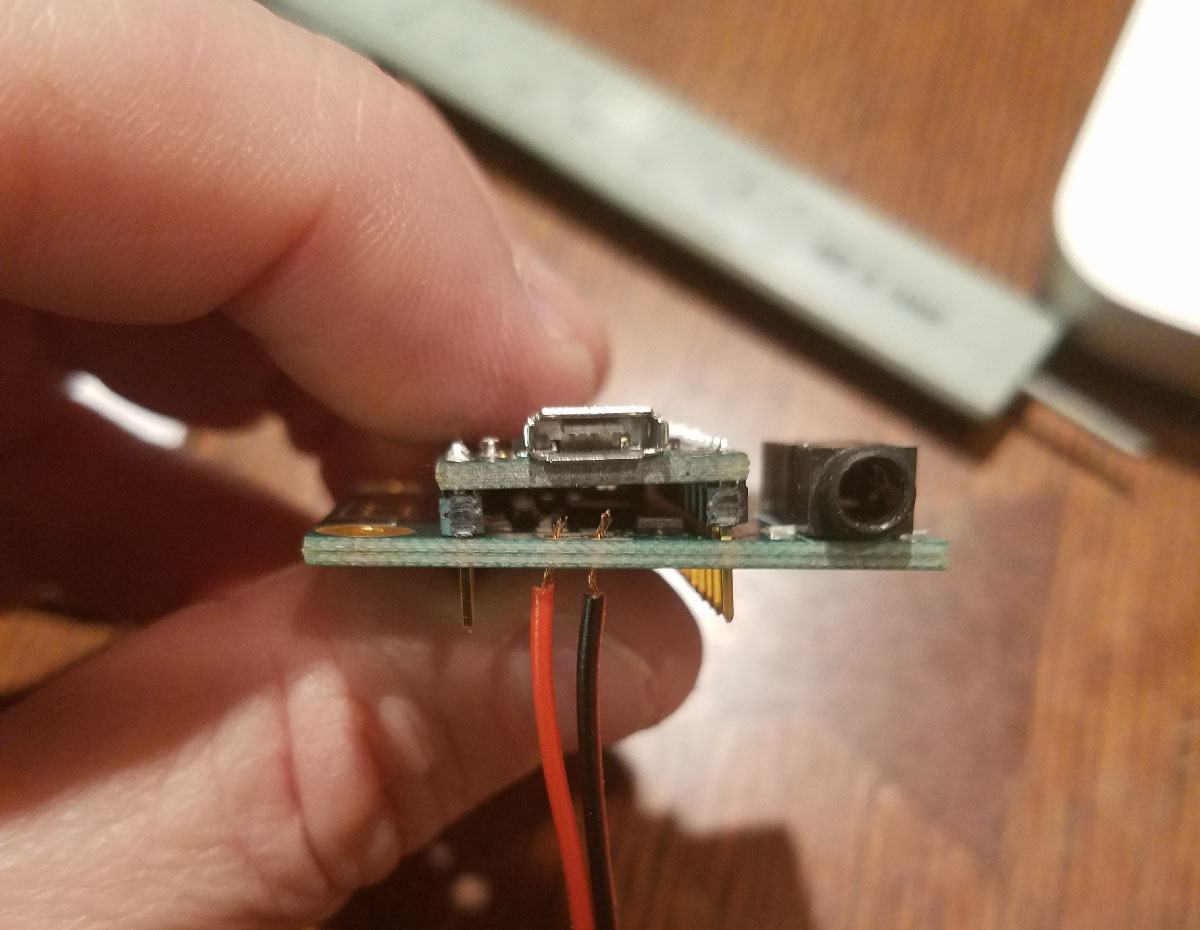
There is not much clearance between the boards, so solder the mic wires FIRST and leave room.
Once again, since there is hardly any clearance between the Teensy and the Audio shield, solder the lead wires for the microphone BEFORE attaching the Teensy and Audio Shield together. There is very little clearance, so make sure the wires do not stick up very far or you could cause a short.
Since I don’t have an enclosure designed for this version, just make sure you have at least 2.5 inches of lead wire in order for the microphone jack to fit anywhere in the enclosure.
I’ll be designing a 3-D printed case for Version 2 as well. Stay tuned!