From the art project “11 Days” by artist Florian Mehnert
The Beginning…
Last year I was contacted by an artist from Germany regarding the web-controlled paintball gun that I had built. He said he wanted to use it in an art project he was planning and wanted to know if I would be willing to help him build his own paintball turret that could be controlled via the internet.
Since my original intent for building the paintball gun was to allow people to control it over the internet (but, alas…life and all that got in the way) I was excited to have the opportunity not only to provide assistance, but to finally see that vision realized. I mean, how cool is it to be able to control something like that over the internet…but how much cooler to control it when it’s half-way around the world!
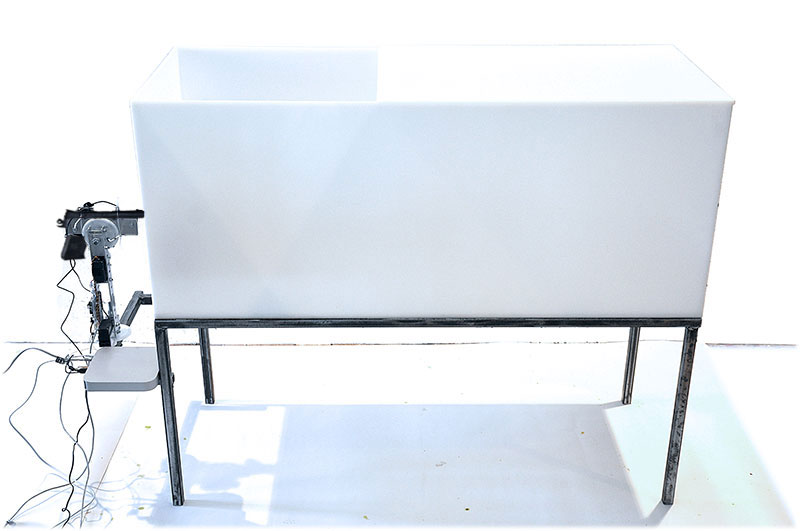
After several months of e-mails back and forth, we started in earnest around December of 2014. I sketched out the basics of the design and gave him a hardware list. He had constructed his own base for the turret which I thought was a very elegant and simple design. I sent him wiring schematics and in short order he had a working paintball turret.
The Setup…
The next thing was for me to update the software that would be needed to control the gun. I had written several versions of the software previously, including one that allows people to vote via hashtag on Twitter and have the paintball gun shoot some pre-programmed target based on the the tally, but I needed to make sure it would be robust enough to handle a LOT of traffic PLUS I had to add a queuing system and some other features.
I won’t go into all he boring details here (I’m more than happy to do that if you want to contact me to discuss the project, however…) so here is a summary of what was used and how it was setup.
The first thing to figure out was how all of the moving parts would fit together. After a couple trials, I decided on a distributed approach that consisted of:
- Local installation of FFMPEG on a computer with a webcam connected – This was used for live video streaming. FFMPEG notes itself as being the “Swiss Army Knife” of video tools…and it’s true!
- Local installation of Node JS on the same computer – this system was basically a pass-through from the web layer (explained later)…in other words, it had a minimal configuration that told it about the servos (min/max angles, etc.) and was responsible for communicating with the Arduino to control the servos for the paintball gun.
- Remote installation of Node as a streaming server – the local video stream connected to the remote streaming server for video distribution.
- Remote installation of Node as web server and socket server that would interpret client movement in the browser and translate coordinates appropriately and send them to the local Node server to control the paintball gun.
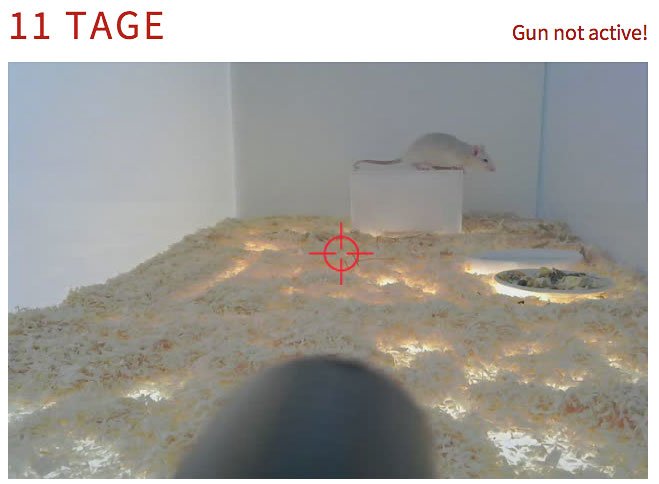
The rat’s “cage”
This type of setup gives maximum flexibility and allows for variations in implementation…in other words, the “middleware”, so to speak, at the web server layer is responsible for making sure that the translated user movements fit within the limitations of the local configuration. If you want to change the experience…say, the way the user can move the paintball gun, for example…you could do that by changing just the middleware layer and leave all of the other stuff alone.
In a nutshell, it works like this:
- A configuration file (in JSON format) defining servos, min/max/home angles and communication settings is loaded by the local Node installation.
- The local Node instance then communicates to the Arduino and sends this configuration (the code on the Arduino is also basic in that it performs minimal checking of angle limits, etc.)
- The local Node instance then connects to the remote instance (defined in the config file) and sends these same settings.
- Users connect to the remote Node server, which acts as both web server and socket server. The size of the video display area is sent to the web server which then calculates a movement ratio based on the settings received from the local Node instance. This way, the user’s movements on screen are more accurately translated into the paintball turret’s movements.
The video server was a very simple setup: FFMPEG running on the local computer connecting to a remote streaming server (also Node JS.) When a user connects to the website, a video streaming socket is also opened so that they can watch as other people move the turret around.
One of the major benefits of this setup was that the artist’s internet connection at his studio did not have to be hugely robust (decent, but not super fast) as all the heavy lifting would be handled by the remote server. After all, it was only used for the video stream and basically-one way communication to the local Node controller (in, fact, if not for the video stream, the connection would not need to be very fast at all.)
The Premise…
The artist, Florian Mehnert, had caused some controversy with his previous art projects (just Google Florian Mehnert) and this project was not going to disappoint.
As a sort of protest against the use of drone strikes, he was going to allow people from all over the world to control a gun (no one knew is was a paintball gun at the time) and be able to shoot a rat at the end of an 11 day countdown.
Long story short, the project caused all kinds of commotion over in Europe, leading to extreme spikes in traffic on the website and news reports, even death threats. In fact, the threats got so bad that the experiment ended early and the rat was removed from the experiment (don’t worry, the rat was never actually going to be shot.)
If you visit the site now, you’ll see the true intent and message of the project.
I had planned on posting all of the code to GitHub, but have not had the time to get it prepared for public use. However, if you think you would like to experiment with the code in your own, project, just drop me a line.


